1. Stop retyping names — import your Partiful guest list in seconds
If you've already sent your invitations through Partiful, your RSVP list is sitting right there — every confirmed guest, already spelled correctly. The last thing you want to do is retype all of it somewhere else.
So we made it so you don't have to. You can now import your guest list directly from Partiful. Export your RSVPs, drop them into Seat the Party, and every confirmed guest shows up in your unseated panel — ready to drag into seats. One step, done.
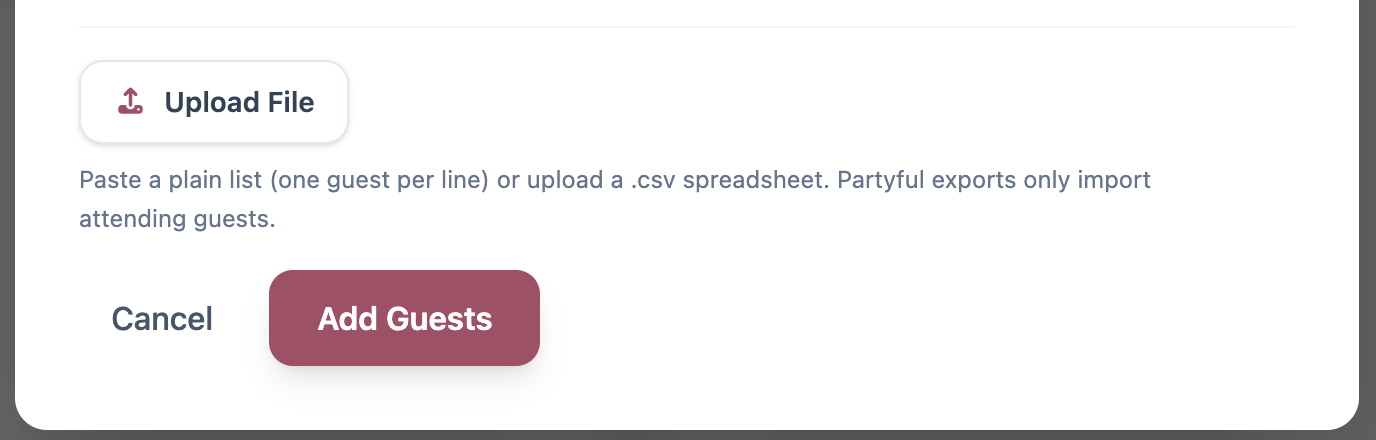
And if someone's plans change after you've imported — a last-minute cancellation, a late yes — you can always add or remove guests individually. The import gets you started; the app keeps up with you from there.
2. Seat an entire table at once — a game-changer for large parties
Here's the thing about big guest lists: once you know the Johnson family all belongs at Table 6, dragging them in one by one starts to feel like busywork. If you've got 12 members of the bridal party going to the same table, that's 12 individual drags.
Not anymore. You can now select multiple guests at once and assign all of them to a table in a single move. The right number of seats fills in automatically. Select your guests, pick the table, and everyone's placed.
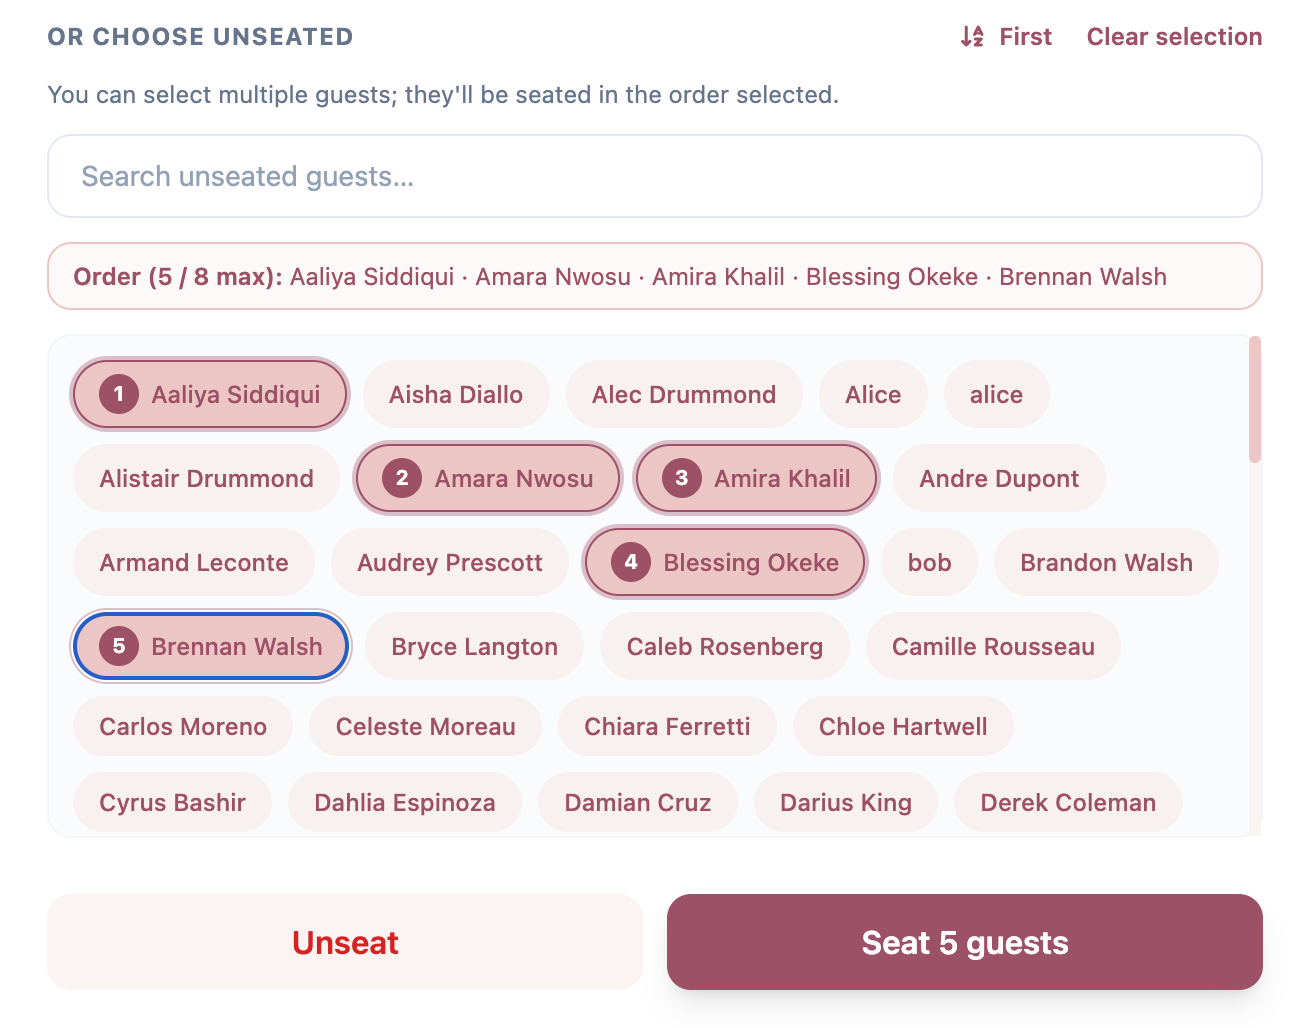
This is especially useful for events with 100+ guests, where you're seating in logical groups — families, friend circles, colleagues — rather than one person at a time. Work through your biggest tables first and the rest of the plan comes together fast.
3. Find any guest in seconds with instant search
Picture this: you're 80 guests deep into your seating plan and your future mother-in-law calls to say she thinks you moved Aunt Carol. You open your guest list to check. Aunt Carol is somewhere in a list of 160 names. You start scrolling.
That's fixed. There's now a search bar right in your guest panel. Start typing a name and your list filters instantly — no waiting, no page reload. You'll find anyone in seconds, whether your list has 30 guests or 300.
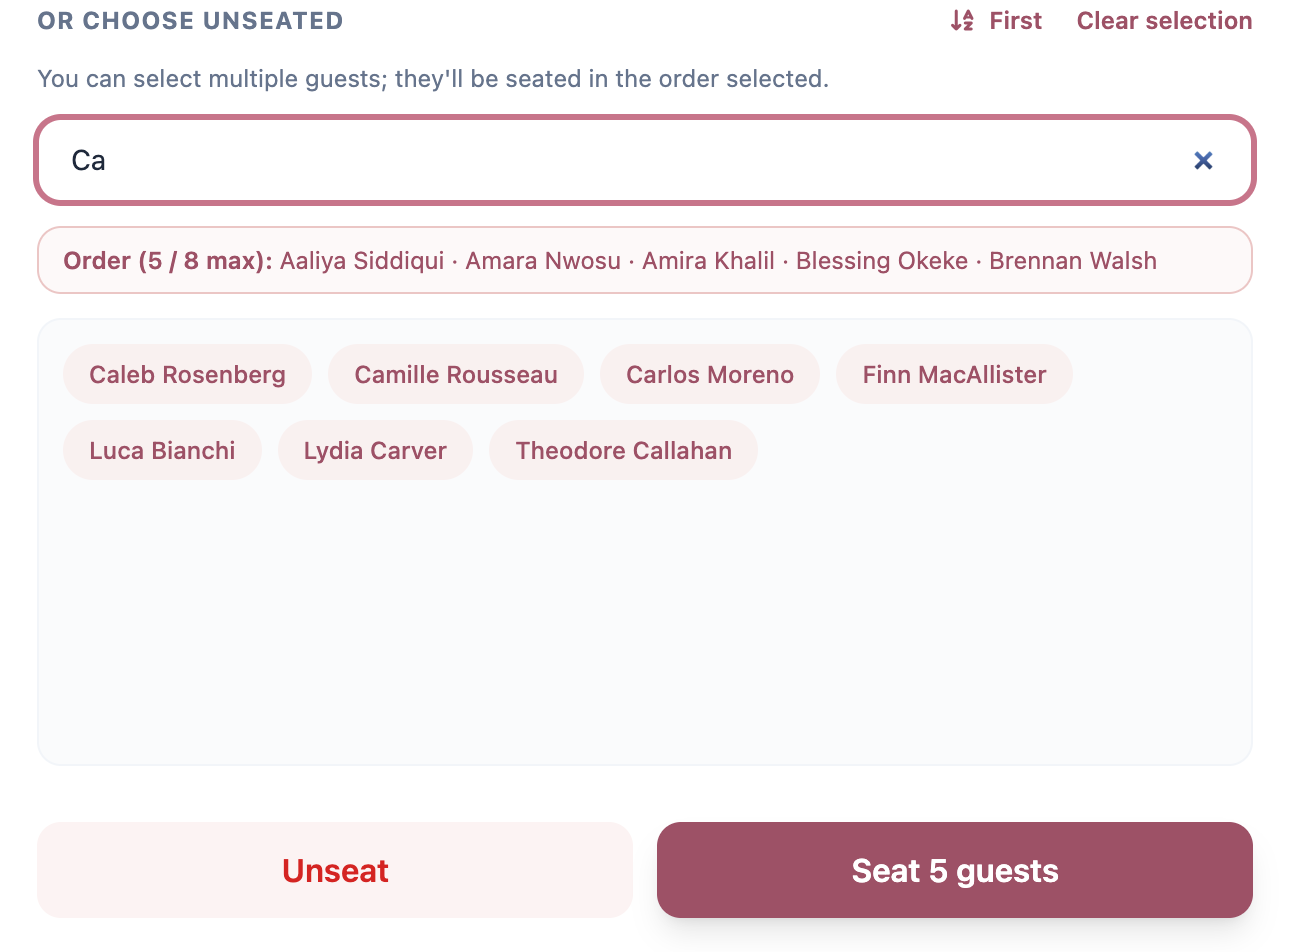
It also comes in handy on the day of your event, when someone walks up to the welcome table and needs to know where they're sitting. Pull up the app, search their name, done.
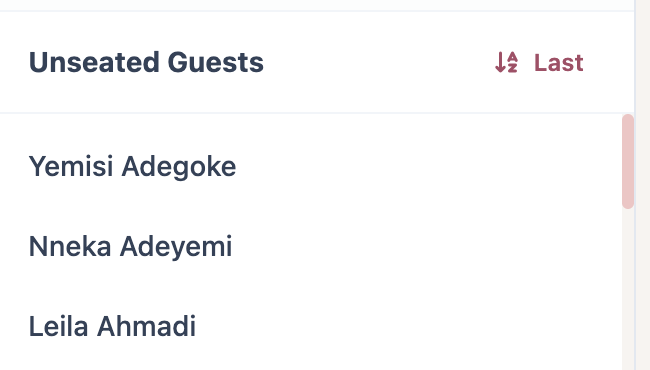
4. Sort by last name to organize guests by family
When you're seating a family of five, you want to see all five of them together — not scattered across your list based on when you added them. And when your venue hands you a printed guest list that's alphabetical by last name, you want your digital plan to match so you're not constantly translating between the two.
You can now sort your unseated guest list alphabetically by last name. One click and your whole list reorders — every Martinez together, every Chen together, every extended-family cluster right where you'd expect it.
5. Set your table defaults once — and apply them everywhere
If every table at your venue is a round table for eight, you shouldn't have to configure that individually every time you add a new one. And if you've already set up your layout and then realized all your tables should be rectangular instead, changing them one at a time is exactly the kind of tedious work we're trying to eliminate.
Table Settings lets you define a default table type (round or rectangular) and a default seat count — and then apply those defaults to every table already on your plan with a single click. Set it once in your event settings, hit Apply defaults to existing tables, and your whole layout updates instantly.
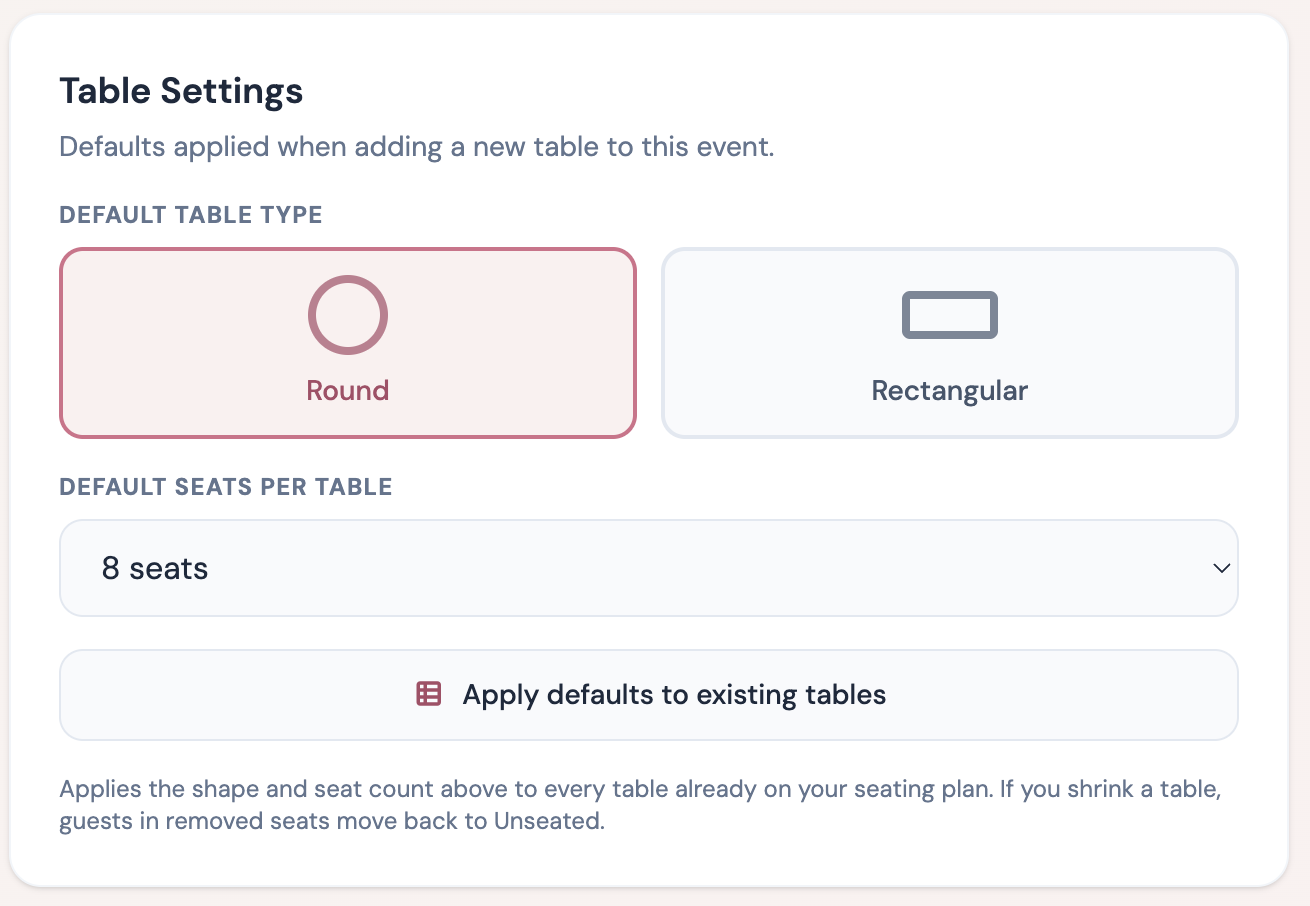
One thing worth knowing: if you shrink the seat count and some guests end up in seats that no longer exist, those guests are automatically moved back to Unseated — so no one quietly disappears from your plan. You'll see them in the panel and can reassign from there.
6. A guided tour so you know exactly where to start
We've heard from a lot of first-time users who opened the app, saw the interface, and weren't sure where to begin. Not because it's complicated — but because seating chart tools have a lot of moving parts, and it's not always obvious what order to do things in.
New users now get a short guided tour the first time they open Seat the Party. It walks you through the core flow — creating your event, adding tables, importing your guests, and sharing your plan — so you're never staring at a blank screen wondering what to click first.
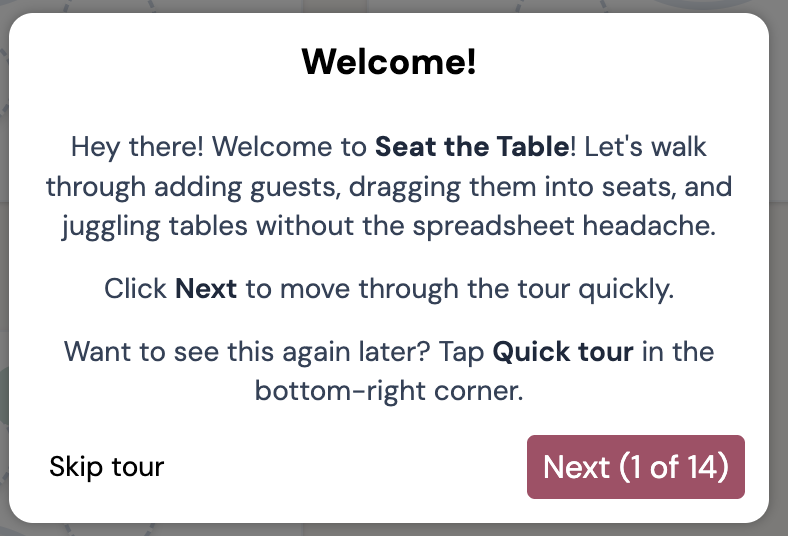
If you've been using Seat the Party for a while, you won't see it — the tour is just for people who are brand new. Think of it as having someone sit next to you for the first five minutes and say, "here's what everything does, now you've got it."
Everything is live — go try it
All six of these updates are available right now in Seat the Party. No update required, no waiting — open the app and they're already there.
We're continuing to work on ways to make large-event planning smoother, and we've got more coming on the share and export side too. If there's something specific that's still slowing you down — or something you wish the app could do — tell us. Most of what's in this update came directly from people sharing what wasn't working for them. We're listening.
Now go enjoy the planning. Or at least make the seating part a little less painful.